Before the CTF I was learning about some Android stuff. I practiced decompiling and reversing APKs, and this challenge was exactly that. We need to reverse engineer the APK to find the flag. It was awesome being able to solve this challenge after practicing it right before, it really paid off.
The Challenge
We simply get an OTPVault.apk file which is the app we need to inspect. If we load the APK into a program like Android Studio we can run it in an emulator. If you haven't set it up already, you can create an emulator device in the AVD Manager (Android Virtual Device Manager). Then you can run the app in the emulator to see what it does.
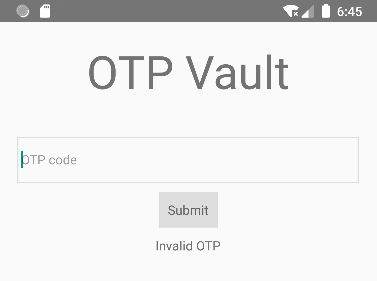
When we launch the application we just get a form with an "OTP code" input field. If we try to submit anything we just get an "Invalid OTP" message.
One of the first steps to do when dealing with an APK is to look at the code. From there we can really understand how the app works, and if we can somehow bypass this screen.
Reverse Engineering the APK
A simple way to view the code of an APK is to load it up in Android Studio. When doing this make sure to use the "Profile or Debug APK" option. This will open the APK and list the files contained in it.
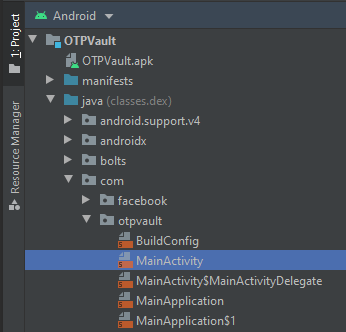
On the left side, we see the Project panel. This is a directory structure with decompiled code and files. First, open the main OTPVault folder, then we see a java folder. This is interesting because it might contain some of the logic of the application. Then com is an interesting one because java paths are pretty much a reverse domain name. First comes something like com. and then a name like otpvault. In here the MainActivity file is a default class that almost every app has.
When we double click this file it opens a MainActivity.smali file. From what I understand Smali is a sort of a human-readable version of the Android bytecode.
.class public Lcom/otpvault/MainActivity;
.super Lcom/facebook/react/ReactActivity;
.source "MainActivity.java"


# annotations
.annotation system Ldalvik/annotation/MemberClasses;
    value = {
        Lcom/otpvault/MainActivity$MainActivityDelegate;
    }
.end annotation


# direct methods
.method public constructor <init>()V
    .registers 1

    .line 7
    invoke-direct {p0}, Lcom/facebook/react/ReactActivity;-><init>()V

    return-void
.end method

...
We see a lot of "React" stuff here. React is a popular JavaScript framework to build web apps. But I had heard of React Native as well, which is an Android version of this framework that can be used in native apps. So if we're trying to understand the logic of the app we need to look at the React code.
Reverse Engineering React Native
We can easily recognize React Native by looking in the assets folder. You can't find it in the Project panel like before, but it's in the main OTPVault.apk file. In this folder, we should find an index.android.bundle file. And indeed, we find this file in the assets folder of the APK. We can't directly open it in Android Studio, we need to export all these files first.
Luckily this is a lot simpler than it sounds. An APK file is basically just a ZIP file, so we can just extract it into a folder to view the contents.
After unzipping we see a lot of files. In the assets folder is the index.android.bundle file again. If you are to try and read this file it's an unreadable compiled mess of JavaScript. We first need to decompile it to get anything useful out of it. There is a handy tool I found on StackOverflow for someone with the same problem. Using the npm module called react-native-decompiler we can easily decompile the file into separate readable JavaScript files.
This will create an output folder containing the JavaScript files. This isn't perfect because the code is decompiled, there is just no source available. But it's way better than before.
It created 45 .js files which all combined are hard to look through manually. But a handy trick is to start by looking for a known string, like "Invalid OTP". We saw this when we inputted a wrong code, so we might be able to find why it was wrong. We can use grep to find this string in the files.
And sure enough, we find that in the 396.js file there is our error string. We can open this whole file now to see what it does. Around line 70 we get some interesting code with a getFlag function:
We see a URL and some tokens. If we visit the URL (http://congon4tor.com:7777/) we get a message:
No flag sorry
So no flag on the index page directly, but we have some other values we might need to send with it.
Firstly, we see the n.url + '/flag' which is the URL plus /flag. If we now try to visit this URL (http://congon4tor.com:7777/flag) we get another message:
{"error":"Missing authorization header"}
So we're now missing the Authorization header. Luckily we also see this header with a Bearer token in the code. If we use a program like Burp Suite to send a request with this specific header added:
HTTP/1.1...we get the flag in the response!
HTTP/1.1